Sail through Kubernetes Deployments with Helm Charts
Simplified Application Management and Scaling Made Simple

Hey there! I'm Pranav Masekar, a dedicated Flutter developer who's all about crafting captivating mobile apps that not only look stunning but also deliver unforgettable user experiences. But it doesn't stop there – I'm also a passionate blogger, sharing insights and best practices within the Flutter community. By contributing to the growth and knowledge-sharing of fellow developers, I'm committed to fostering a dynamic and collaborative environment. And let's not forget my DevOps journey – as a seasoned engineer, I've got the CI/CD pipelines, infrastructure-as-code, and cloud platforms down to an art.
Welcome to our tech blog, where we dive into the world of Helm charts and how they revolutionize Kubernetes deployments. As the complexity of containerized applications grows, managing their deployment and scaling becomes increasingly challenging. Thankfully, Helm charts offer a solution by providing a simple and standardized way to package, distribute, and manage applications on Kubernetes.
In this blog post, we will explore the power of Helm charts and uncover how they streamline the deployment process, making it easier than ever to manage and scale your applications in a Kubernetes environment. We will also see some helm commands and we will also create our helm chart.
Prerequisites -
Basic Kubernetes knowledge
Minikube Installed
Lot’s of passion to learn
What is Helm?
Helm is the package manager for Kubernetes, designed to simplify the deployment and management of applications on a Kubernetes cluster. For Flutter we have a pub, for Node we have NPM. With Helm, we can define and package our application as a Helm chart, which acts as a reusable template, which can be shared publicly to share your work. Helm enables you to easily install, upgrade, and uninstall applications on Kubernetes using simple Helm commands.
One of the key advantages of Helm is its extensive library of pre-built charts available globally. This includes a famous monitoring stack containing Prometheus, Grafana and Alert Manager and many more.
Helm also solves one of the core problems of Kubernetes and that is repetition. Traditionally we need to write separate deployment and services for each application. Well, this works when we have a Monolith application but in the case of Microservices, we need to create deployment and service files for each microservice instead of having the same format for each configuration file. Helm solves this problem by using templates.
By using Helm we can create a custom template for our deployment and service files using Template interpolation and values.yaml file. We will see this in detail in a later part of the blog.
So as we now have a basic understanding of what Helm is, Let’s install Helm CLI in our local system. I am using a Linux system so I am going to show commands for Linux but for different operating systems, you can visit this.
curl -fsSL -o get_helm.sh https://raw.githubusercontent.com/helm/helm/main/scripts/get-helm-3

chmod 700 get_helm.sh

./get_helm.sh
You can use
helm version
Command to ensure the installation of the helm.
As I said before we have prebuilt Helm charts of different applications available for us to reuse, But they are not hosted on the official website of Helm. These charts are hosted on https://artifacthub.io/. This is one of the major problems with Helm charts as anybody can host their helm chart on artifacthub.io, it becomes crucial to pick the right Helm chart which is hosted by a verified organization. So let’s move on to the actual hands-on part.
🧑💻 Helm Commands and Demo -
Let’s use our first helm chart in the local minikube cluster.
So open up the link https://artifacthub.io/packages/helm/prometheus-community/kube-prometheus-stack. This is the official helm chart for the complete monitoring stack on Kubernetes. By using this helm chart we can add monitoring to the cluster within seconds. So let’s run the following commands -
helm repo add prometheus-community https://prometheus-community.github.io/helm-charts
helm repo update
helm install monitoring prometheus-community/kube-prometheus-stack
First commands add the Helm chart in the repository of the Helm folder. The second commands help us to update if there is any newer version available. The third command installed a helm chart on our minikube cluster. So before running the third command ensure that Minikube is running. You can check the status of your Minikube cluster using the command -
kubectl get all
This will list down all the deployments, services and other Kubernetes components created by the helm chart.
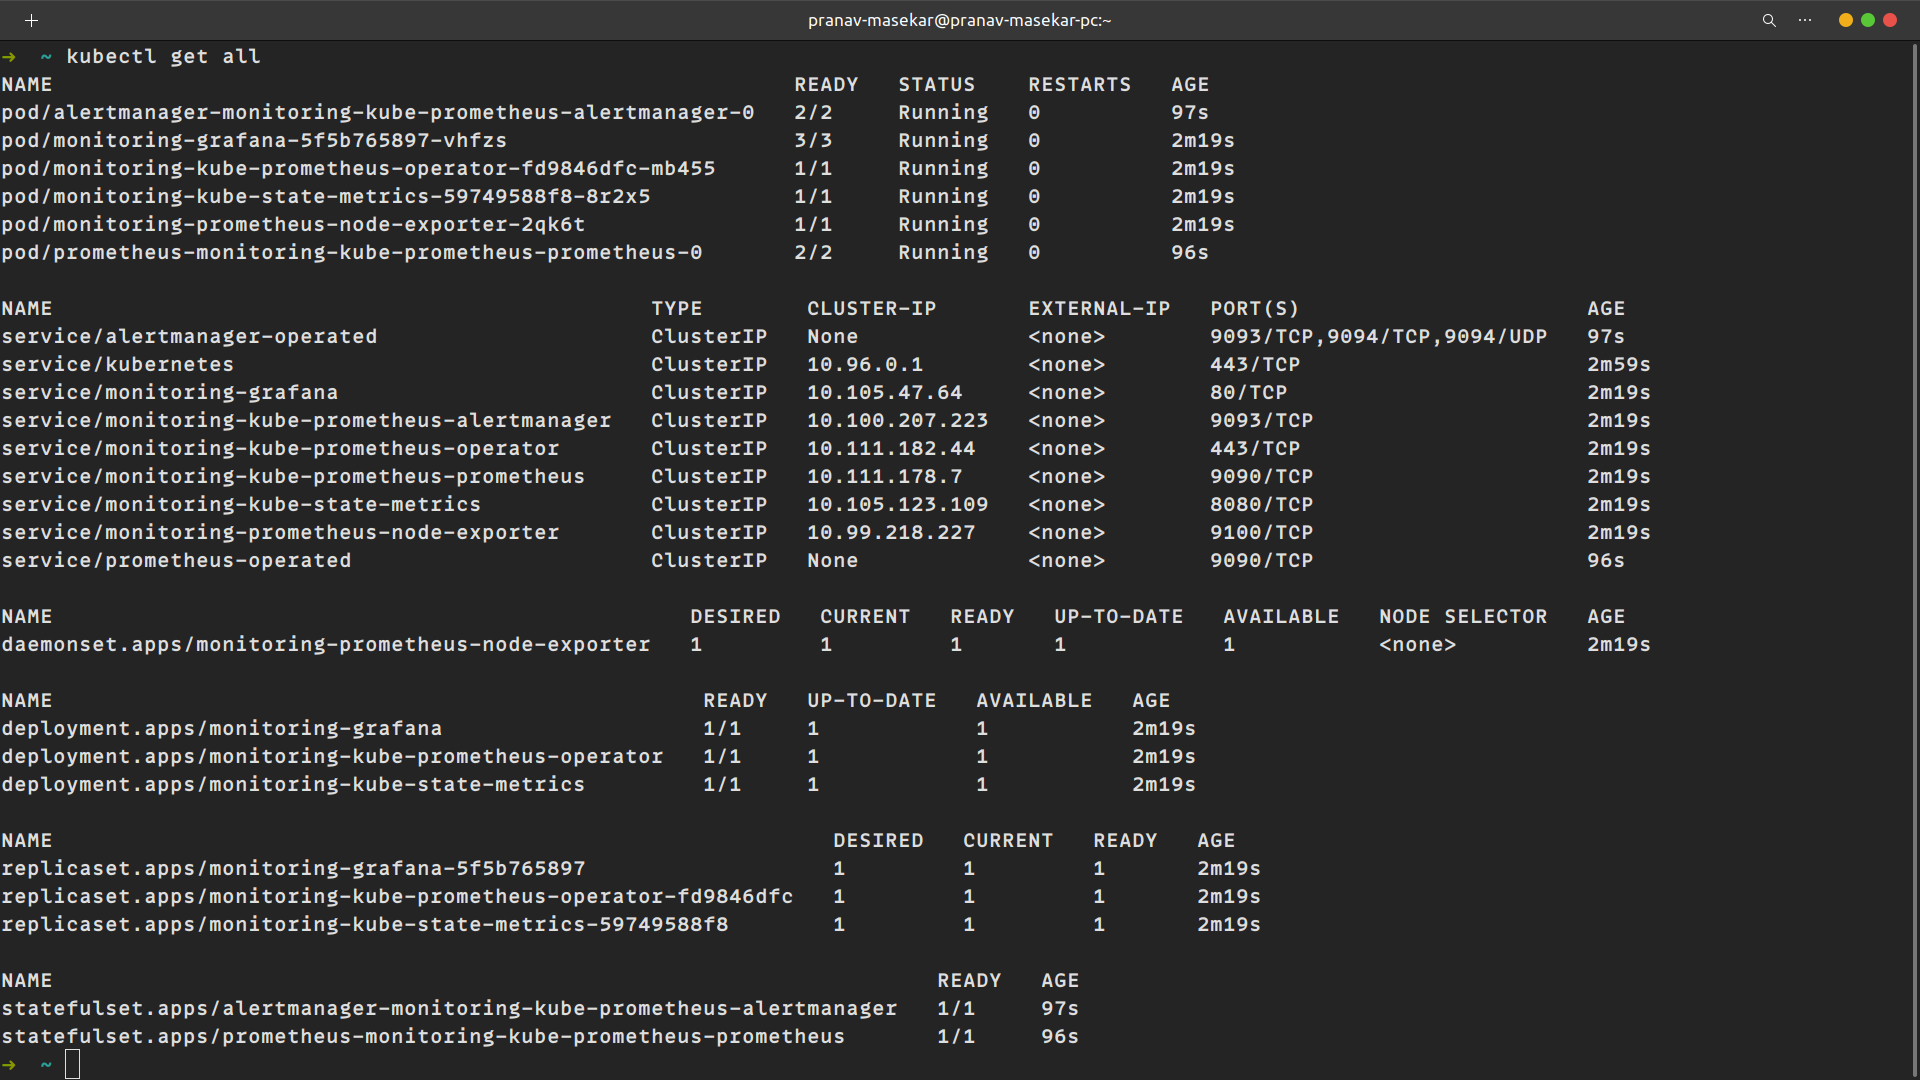
And with one single command, we have installed a complete monitoring stack in our Minikube cluster. But we can’t access any of the services because these are of type ClusterIP which is not accessible. So for that, we need to somehow edit the service type of monitoring-grafana service from ClusterIP to NodePort. So for that, we need to dig up some documentation to find out which parameter in the monitoring helm chart changes the service type.
So if we observe the documentation of Grafana we can see that there is a variable name service.type that needs to be set to Nodeport instead of ClusterIP. So how do we change the configuration of the existing helm chart ??
We don't need to change the helm chart but we need to provide our custom values to the helm chart. Helm allows us to pass custom values through values.yaml file. We can find all lists of variables that can be changed in the official repository. So create myvalues.yaml file and add this
grafana:
  adminPassword: admin
  service:
    type: NodePort
    nodePort: 30001
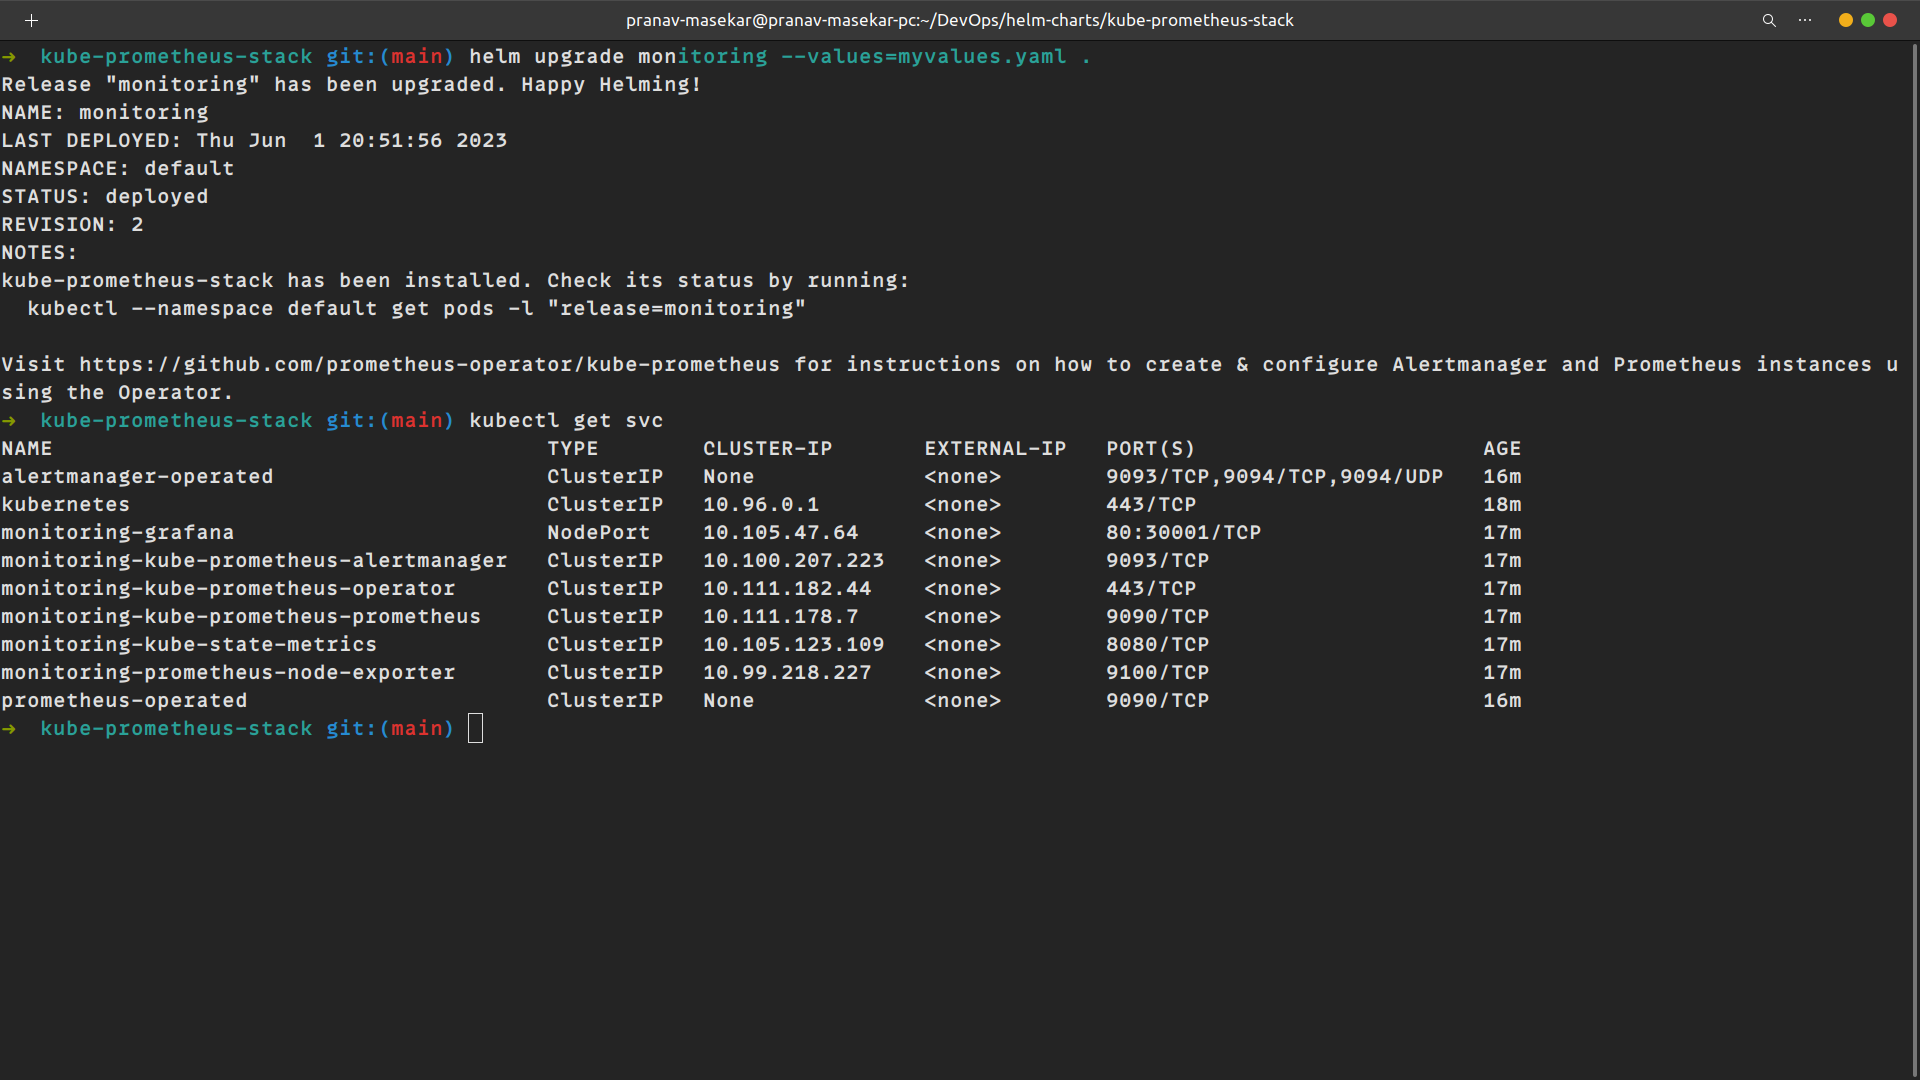
It is just a simple yaml file that defines the service type to NodePort and its port number. We also define a password for our Grafana dashboard. So let’s apply this file to our helm chart -
helm upgrade monitoring --values=myvalues.yaml .
The syntax is like helm upgrade <NAME> --values=<FileName> Path
Now we can access the Grafana UI with the following link -
<minikube-ip>/<NodePort>
i.e. in my case its http://192.168.49.2:30001/
Enter username as admin and password as admin and click skip to access the dashboard. And with just a short amount of time, we have created monitoring of our cluster using Helm Chart.
To remove the helm chart from the cluster use
helm uninstall monitoring
🧑💻 Creating custom Helm Chart -
So to create our helm chart run -
helm create application
Where an application is the name of a helm chart which can be anything. This will create a folder of the provided name. Inside that folder, helm has created subfolders like charts, templates and some yaml files. Everything inside the templates folder is the example files so go ahead and empty the entire folder. Also, delete all content from values.yaml file as we are going to create our own. So as of now, your folder structure should be like this: charts and template folders empty and values.yaml empty.
So let’s create templates for our deployment and service files.
Create deployment.yaml file inside the templates folder.
apiVersion: apps/v1
kind: Deployment
metadata:
  name: {{ .Values.deployment.metadataName }}
spec:
  replicas: {{ .Values.deployment.replicas }}
  selector:
    matchLabels:
      app: {{ .Values.deployment.appName }}
  template:
    metadata:
      labels:
        app: {{ .Values.deployment.appName }}
    spec:
      containers:
      - name: {{ .Values.deployment.containerName }}
        image: {{ .Values.deployment.image }}
        ports:
            - containerPort: {{ .Values.deployment.containerPort }}
It’s a standard deployment file but all the hardcoded values are replaced with {{ .Values }} syntax. This is what makes it reusable. All the values which are defined using this syntax will be provided inside values.yaml file. I will explain that later when we make values.yaml file but let’s also create service.yaml file.
apiVersion: v1
kind: Service
metadata:
  name: {{ .Values.service.metadataName }}
spec:
  type: {{ .Values.service.serviceType }}
  selector:
    app: {{ .Values.service.appName }}
  ports:
  - name: http
    port: {{ .Values.service.port }}
    targetPort: {{ .Values.service.targetPort }}
Now to define values we modify values.yaml file.
environment: dev

deployment:
  metadataName: simple-web-app-deployment
  replicas: 1
  appName: simple-web-app
  containerName: simple-web-app
  image: yeasy/simple-web:latest
  containerPort: 80

service:
  metadataName: simple-web-app-service
  appName: simple-web-app
  serviceType: NodePort
  port: 80
  targetPort: 80
We have defined all these values in this file and when we execute this command these will get substituted in our yaml file. The important thing is to notice the structure of the values and how to use it inside template files.
We can access values in values.yaml file using {{ .Values }} syntax
We need to provide a proper path for the values like if we want to use replicas values inside the deployment file, we have to use {{ .Values.deployment.replicas }}. We can’t use it directly {{ .Values.replicas }}.
We can have as many values as possible in values.yaml file.
All this templating is featured from Golang, to know more about this templating visit this.
As we have created our helm chart, let's install it in our Minikube cluster. So for that run -
helm install <Name> <Path-Helm-Chart-Folder>
With this, we have successfully created our own Helm Chart using the Helm tool for Kubernetes.
Congratulations 🎉 🎉 You have successfully implemented Helm in your Kubernetes cluster.


