One State to Rule Them All: Simplifying Flutter BLoC
Implementing a simplified state management solution with a single state model

Hey there! I'm Pranav Masekar, a dedicated Flutter developer who's all about crafting captivating mobile apps that not only look stunning but also deliver unforgettable user experiences. But it doesn't stop there – I'm also a passionate blogger, sharing insights and best practices within the Flutter community. By contributing to the growth and knowledge-sharing of fellow developers, I'm committed to fostering a dynamic and collaborative environment. And let's not forget my DevOps journey – as a seasoned engineer, I've got the CI/CD pipelines, infrastructure-as-code, and cloud platforms down to an art.
Introduction :
The BLoC (Business Logic Component) pattern has become popular for managing state in Flutter apps by separating business logic from the UI layer. But BLoC patterns come with a lot of boilerplate code and a lot of code duplication. Every bloc implementation requires a set of state classes to be defined and used in the UI accordingly. Most of the time developers use the same kind of state classes for the BLoC. This code repetition leads to a large size of the codebase and makes it harder to manage on scale. One state-class solution aims to resolve all these issues regarding the BLoC. This article provides an overview of implementing a single-state BLoC in Flutter and shows sample code.
Prerequisites :
Understanding of Flutter BLoC
Workings of Enums
Excitement to improve your codebase
Implementation :
In this blog, we are going to create a simple authentication bloc that signs up the user and logs in via Firebase. We have all created this type of bloc and we create our state classes like this in our bloc state file.
import 'package:equatable/equatable.dart';

abstract class AuthState extends Equatable {
  @override
  List<Object> get props => [];
}

class Uninitialized extends AuthenticationState {}

class Authenticated extends AuthenticationState {}

class Unauthenticated extends AuthenticationState {}

class AuthLoading extends AuthenticationState {}

class AuthError extends AuthenticationState {
    final String errorMessage;
    AuthError({required this.errorMessage});
    @override
    List<Object> get props => [errorMessage];
}
We want to improve this code as part of our one-state class solution of BLoC.
The main idea in a one-state class solution is to abstract all the states of the bloc into an enum and while emitting a new state we could use copy with a method to update the data of the state class. It will make more sense when we write our one-state class.
part of 'auth_bloc.dart';

enum AuthStatus {
  initial,
  loading,
  error,
  login,
  signup,
}

class AuthState extends Equatable {
  const AuthState({required this.status, this.errorMessage = ''});
  final AuthStatus status;
  final String errorMessage;

  static AuthState initial() => const AuthState(status: AuthStatus.initial);

  AuthState copyWith({AuthStatus? status, String? errorMessage}) => AuthState(
        status: status ?? this.status,
        errorMessage: errorMessage ?? this.errorMessage,
      );

  @override
  List<Object> get props => [status.name, errorMessage];
}
So here we have created an enum to store the state of the bloc like -
Initial
loading
error
login
signup
In the state class, we will specify all the variables that we need to store and which are needed in the UI file. These can be a list of groups or any data that is coming from API. Notice we have also created a copyWith method in the state class to update the data to the state object. We have also created a static method that returns the initial state of the bloc. This is needed at the time of bloc creation.
Now let's see how to use this state class in bloc -
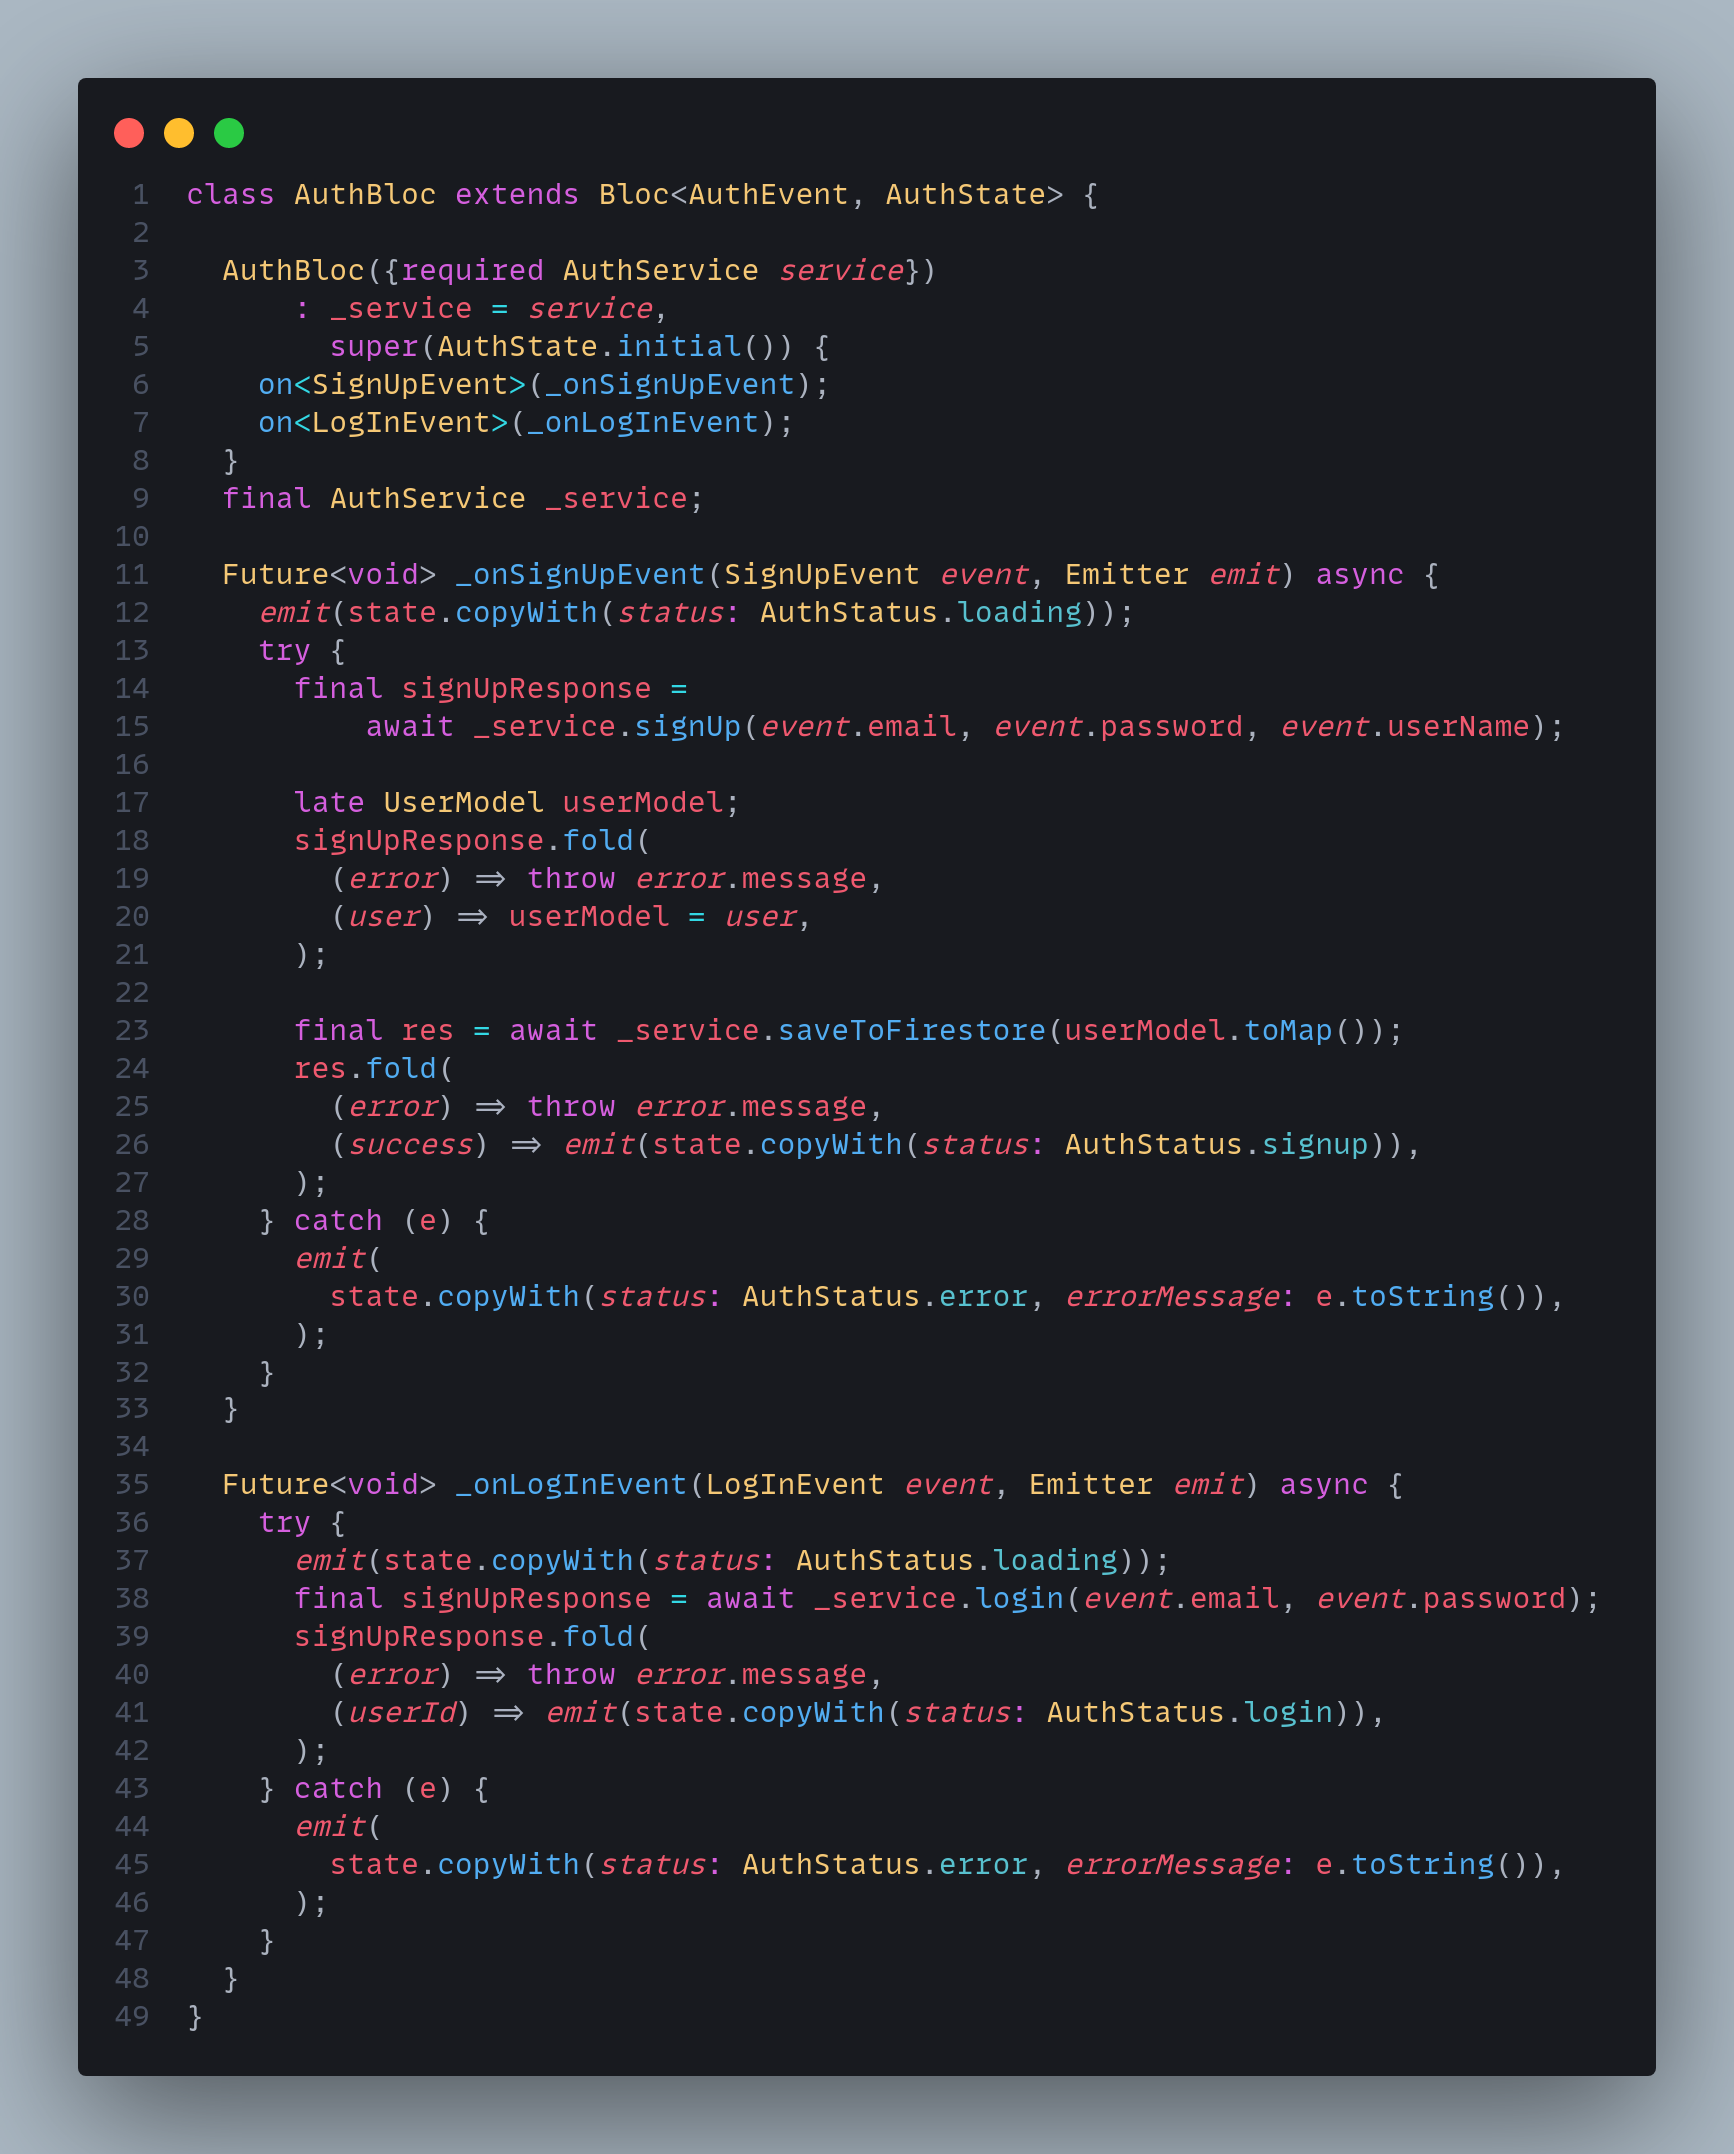
Notice how we have used the copyWith method from the state class to only change a particular variable from the object.

Congratulations, you've reached the end of this guide on managing state with a single state-class solution! Great job following along and getting your Flutter app to a one state BLoC architecture. You're now equipped to handle complex state requirements in a scalable way.
Keep Fluttering 💙💙💙


