Mastering Flutter: Tips for Seamless App Development
Simplify Development and Save Time with These Hacks


Introduction -
Flutter has quickly become one of the most popular frameworks for building cross-platform mobile apps. In this blog post, I will share some useful tips and tricks that can help you become more productive with Flutter. Whether you are just starting with Flutter or have been using it for a while, you are likely to learn something new here. So without further ado, let's dive right in and start levelling up your Flutter skills!
1. Export Files
Suppose in a Flutter project we have a lot of screens that need to be displayed to the user. So in files like app router where we write our navigation logic, we need to import these files one after the other. Like this -
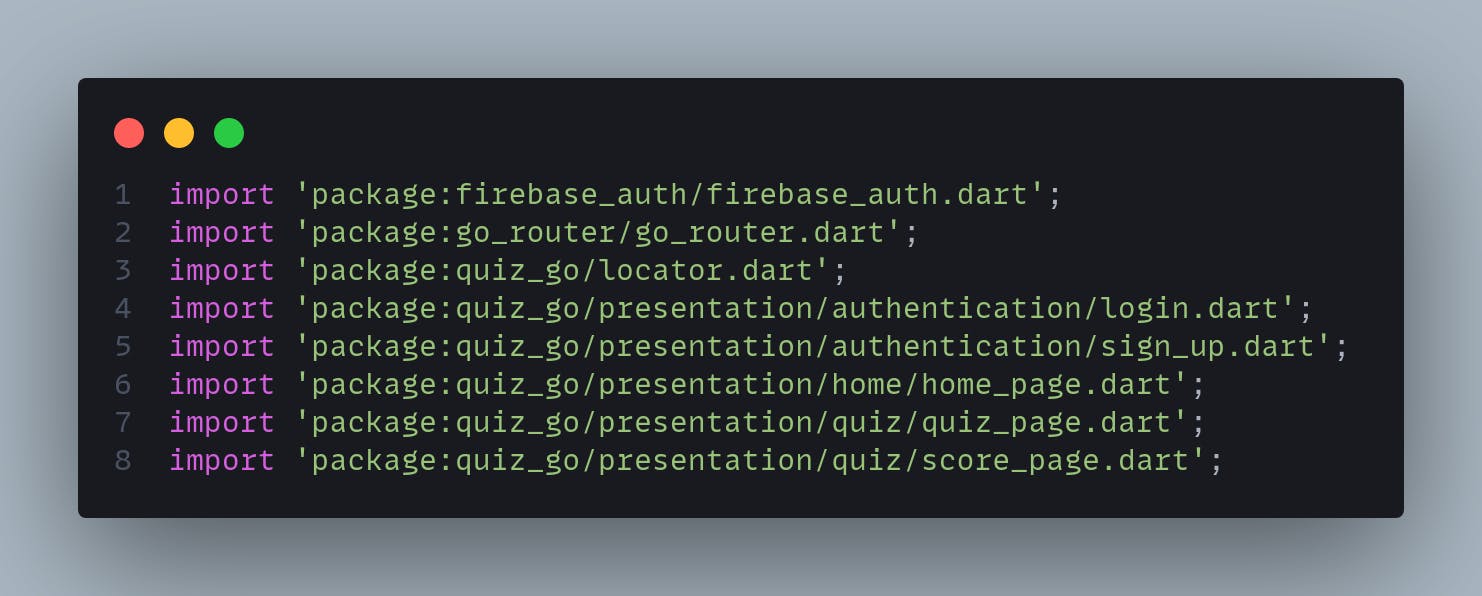
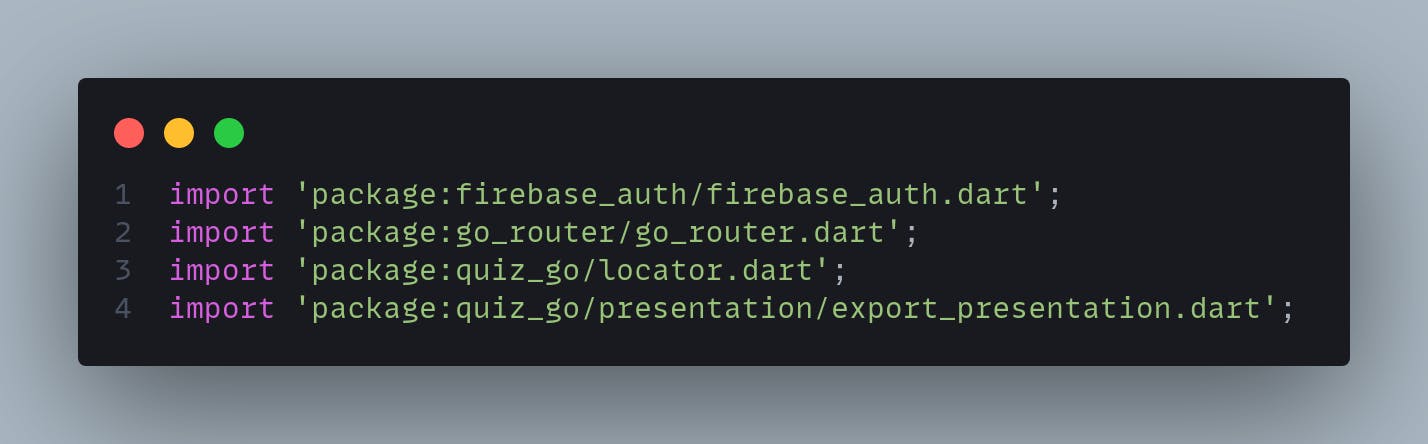
As you can see we have a lot of import files and this will get bigger and bigger as our codebase increases. We can solve this by using export files or barrel files. This is mainly used in Flutter packages. For that, we need to create a file named export_presentation.dart in our presentation folder.
export './home/home_page.dart';
export './quiz/option_widget.dart';
export './quiz/question_page.dart';
export './quiz/quiz_page.dart';
export 'authentication/login.dart';
export 'authentication/sign_up.dart';
export './quiz/score_page.dart';
And the result is this -
2. Asset helpers
Many times in our Flutter project we use images and SVG. Normally we use images in this way -
Image.asset("assets/images/auth.jpg"),
Suppose we are using a lot of images and at some point in future, we need to replace one image with another image. So in this situation, we need to manually change the path of each Image.asset() widget. This can be solved using asset helper classes -
class AssetHelper {
  // Font
  static const String fontFamily = 'Gotham';

  // Assets
  static const String iconPath = 'assets/icons';
  static const String imagePath = 'assets/images';
  static const String animationPath = 'assets/animations';

  // Images
  static const String authSvg = '$imagePath/auth.svg';

  // Icons
  static const String dockerSvg = '$iconPath/docker.svg';
  static const String kubernetesSvg = '$iconPath/kubernetes.svg';
  static const String javaScriptSvg = '$iconPath/javascript.svg';

  // Lottie Animations
  static const String loadingAnimation = '$animationPath/loading.json';
  static const String trophyAnimation = '$animationPath/trophy.json';;
}
In the UI this can be used as follows -
SvgPicture.asset(AssetHelper.dockerSvg);
Further, we can also use code generation tools like Flutter_gen to automate this manual listing of assets. For that read my blog on Code generation.
3. Custom Linters
Linters in Flutter are tools that analyze your code to detect and highlight potential issues, style violations, and best practice adherence. They help ensure code quality, consistency, and maintainability in your Flutter projects by providing feedback and recommendations during development. Flutter by default has one linter that guides us to add const before widgets. But this is not enough to increase the code quality so for that we have a package called very_good_analysis. This package is developed by Very Good Ventures which provides the best practices for Flutter code.
4. Extensions
Flutter extensions are a powerful tool that can be used to extend the functionality of Flutter apps. They allow developers to add new features, improve performance, and simplify their code. There are a wide variety of Flutter extensions available, so developers can find one that fits their specific needs. One of the extension examples is this -
extension DateFormatting on DateTime {

  String toDatewithoutSlashes() {
    final format = DateFormat('dd MMM yyyy');
    return format.format(this);
  }

  String toDateWithFirstMonth() {
    final format = DateFormat('MMM dd yyyy');
    return format.format(this);
  }

  String toDateWithSlashes() {
    final format = DateFormat('dd/MM/yyyy');
    return format.format(this);
  }
}
This extension can be used like this in the UI -
DateTime date = DateTime.now();
String formattedDate = date.toDateWithSlashes(); // 15/07/2023
To know more about extension please read my blog on Flutter Extensions.
5. Custom error screens
Error handling is a crucial aspect of mobile app development. When unexpected errors occur, it's essential to provide users with informative and user-friendly feedback instead of displaying cryptic error messages. In Flutter, you can elevate your app's user experience by implementing custom error screens.
Future<void> main() async {
  WidgetsFlutterBinding.ensureInitialized();
  await Firebase.initializeApp(
    options: DefaultFirebaseOptions.currentPlatform,
  );
  await init();
  ErrorWidget.builder = (FlutterErrorDetails details) => CustomErrorPage();
  runApp(const MyApp());
}
6. Dismiss Keyboard
Many times users want to dismiss the keyboard from a text field by just clicking outside. This isn't supported by Flutter by default so we need to call this method on every page to dismiss the keyboard.
FocusManager.instance.primaryFocus?.unfocus();
But we can do this in the higher level of the widget tree on the material app -
Widget build(BuildContext context) {
    return GestureDetector(
      onTap: (){
        FocusManager.instance.primaryFocus?.unfocus();
      },
      child: MaterialApp(),
    );
  }
7. URLStrategy
Flutter web applications often require proper handling of URLs for navigation and deep linking. The URLStrategy package in Flutter simplifies the process of configuring URL strategies. By default, the Flutter web application contains '#' in the URL of the application. To remove this we use the url_strategy package.
void main() {
  setPathUrlStrategy();
  runApp(MyApp());
}
8. ScreenUtil
Creating responsive Flutter applications that adapt to various screen sizes and orientations is crucial for delivering a great user experience. The ScreenUtils package simplifies the process of designing responsive layouts. This package is mainly used when we are building applications for Android and iOS. Because for web we need to handle layout with the help of MediaQuery. So to use this package we need to have constraints of the application, these are normally dimensions of your figma design.
class MyApp extends StatelessWidget {
  const MyApp({super.key});
  @override
  Widget build(BuildContext context) {
    return ScreenUtilInit(
      designSize: const Size(360, 840),
      builder: (context, child) {
        return MultiBlocProvider(
          providers: [
            BlocProvider(create: (context) => locator.get<AuthBloc>()),
          ],
          child: MaterialApp.router(
            title: 'QuizGo',
            debugShowCheckedModeBanner: false,
            theme: darkTheme(),
            routerConfig: locator.get<AppRouter>().router,
          ),
        );
      },
    );
  }
}
And use the constraints in the UI like this -
  @override
  Widget build(BuildContext context) {
    return Container(
      padding: EdgeInsets.symmetric(horizontal: 20.w, vertical: 10.h),
      margin: EdgeInsets.only(bottom: 15.h),
      decoration: BoxDecoration(
        color: getColor().withOpacity(0.25),
        border: Border.all(color: getColor()),
        borderRadius: BorderRadius.all(Radius.circular(15.r)),
      ),
  }
And that's a wrap! I hope this post improves your Flutter code quality and helps you to become a better Flutter developer. Thanks so much for reading! Let me know in the comments if you give it a try!
Keep Fluttering 💙💙💙